
TEYES CC4 Pro Digital 360 Camera Guide: Packages, Activation and Calibration
The TEYES CC4 Pro Digital 360 camera kit combines front, rear and side camera feeds into a surround view on the head unit. It can help you check kerbs, parking lines and the space next to the vehicle when manoeuvring slowly.

Which 360 camera package fits my TEYES head unit?
Choose CC4 Pro Digital 360 for a compatible CC4 Pro configuration. Choose CC4 Pro 360 + ADAS if you want the six-camera package with compatible driver-assistance features. The standard CC4 uses its own analogue AHD surround-view kit. The CC4L does not support 360° surround view.
Check the exact head unit and variant before ordering. The CC4 Pro Digital 360 setup needs a non-AK configuration and cannot be combined with the separate digital front and rear setup supplied with AK variants. For 12.3-inch models, check the dedicated accessory compatibility guide.
What do the overhead and 3D views show?
The overhead view stitches the camera feeds into a picture of the area around the vehicle. The 3D view presents the same surroundings from another angle. Camera position, vehicle dimensions and calibration affect how well the feeds join. Use the views alongside your mirrors and direct observation.
How do I activate and check CC4 Pro Digital 360?
- Install the compatible kit and connect the head unit to the internet.
- On the head unit, go to Settings → Display and set the reverse camera to 360 Mode.
- Use the unique activation code supplied with your kit when prompted.
- Follow the calibration procedure for your kit, then check each feed and the stitched image with the vehicle stationary.
If a feed is missing, check the camera connections and package compatibility. If all feeds work but parking lines jump at the edges, have the calibration checked. Keep your activation code private when requesting support.
How to calibrate the 360° surround view
This walkthrough adapts the CC3 calibration reference for readers setting up CC4 Pro Digital 360. The original diagrams show the CC3 procedure and interface. For a CC4 Pro installation, follow the mat pattern, measurements, camera profiles and on-screen prompts supplied with your specific kit.
Step 1 – Calibration mats placement
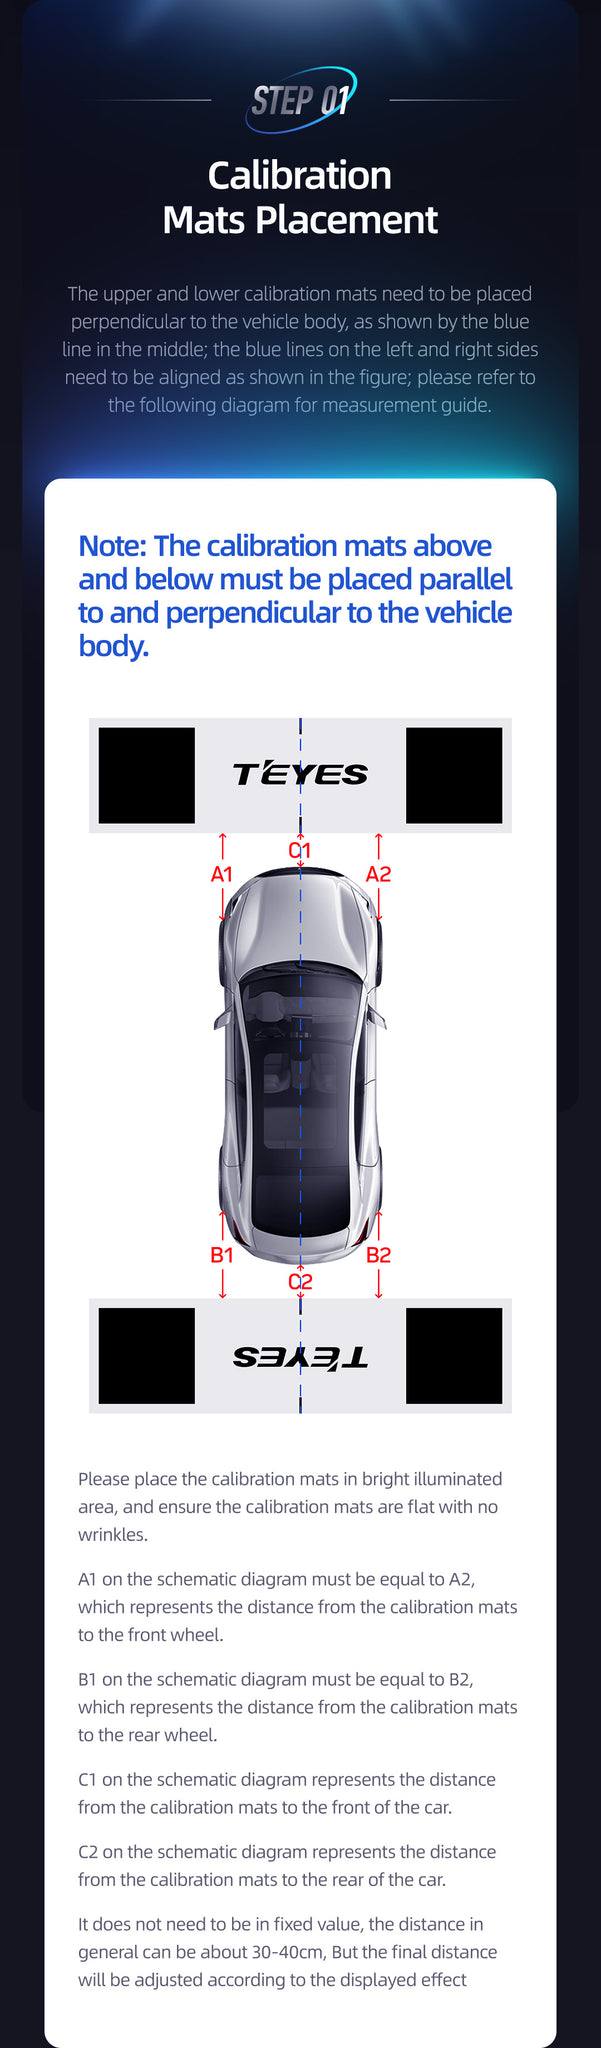
Park on a level, evenly lit surface. Lay the calibration mats flat and use the pattern supplied for your kit. For the two-mat layout illustrated here, put one mat across the front and one across the rear. Centre both mats on the vehicle, square them to its centreline, and compare the left and right distances to the wheels at each end. Adjust until the corresponding distances match and the targets are visible in the camera feeds.
Step 2 – Automatic stitching guide
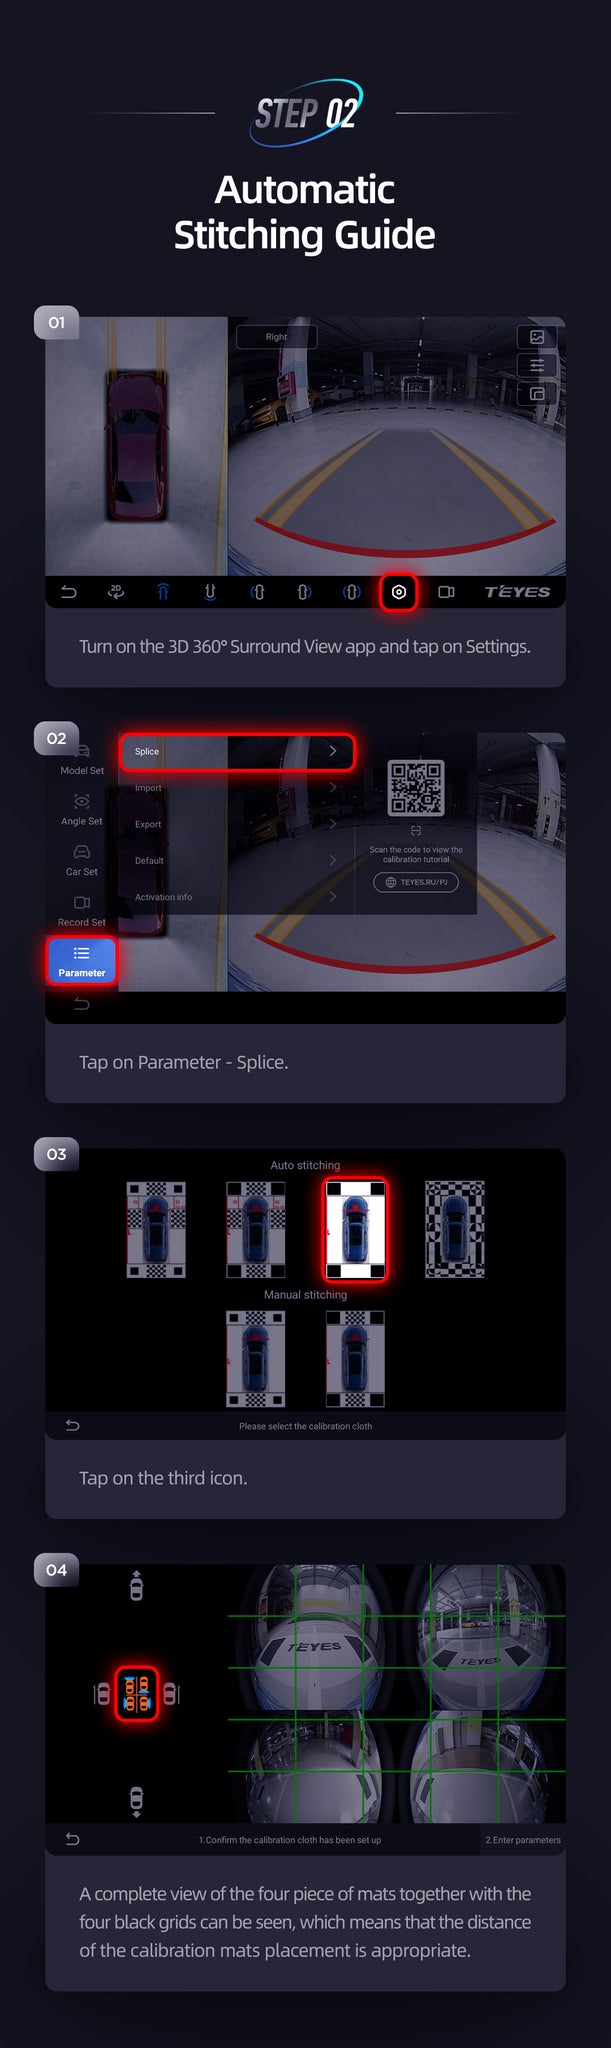
- Open the 360° camera app and go to its settings.
- Open the stitching or calibration section. The CC3 reference calls this Parameter → Splice.
- Select the diagram that matches the actual mat layout. Match the pattern rather than selecting by icon position.
- Open the combined preview. Confirm all four target blocks are visible before continuing.
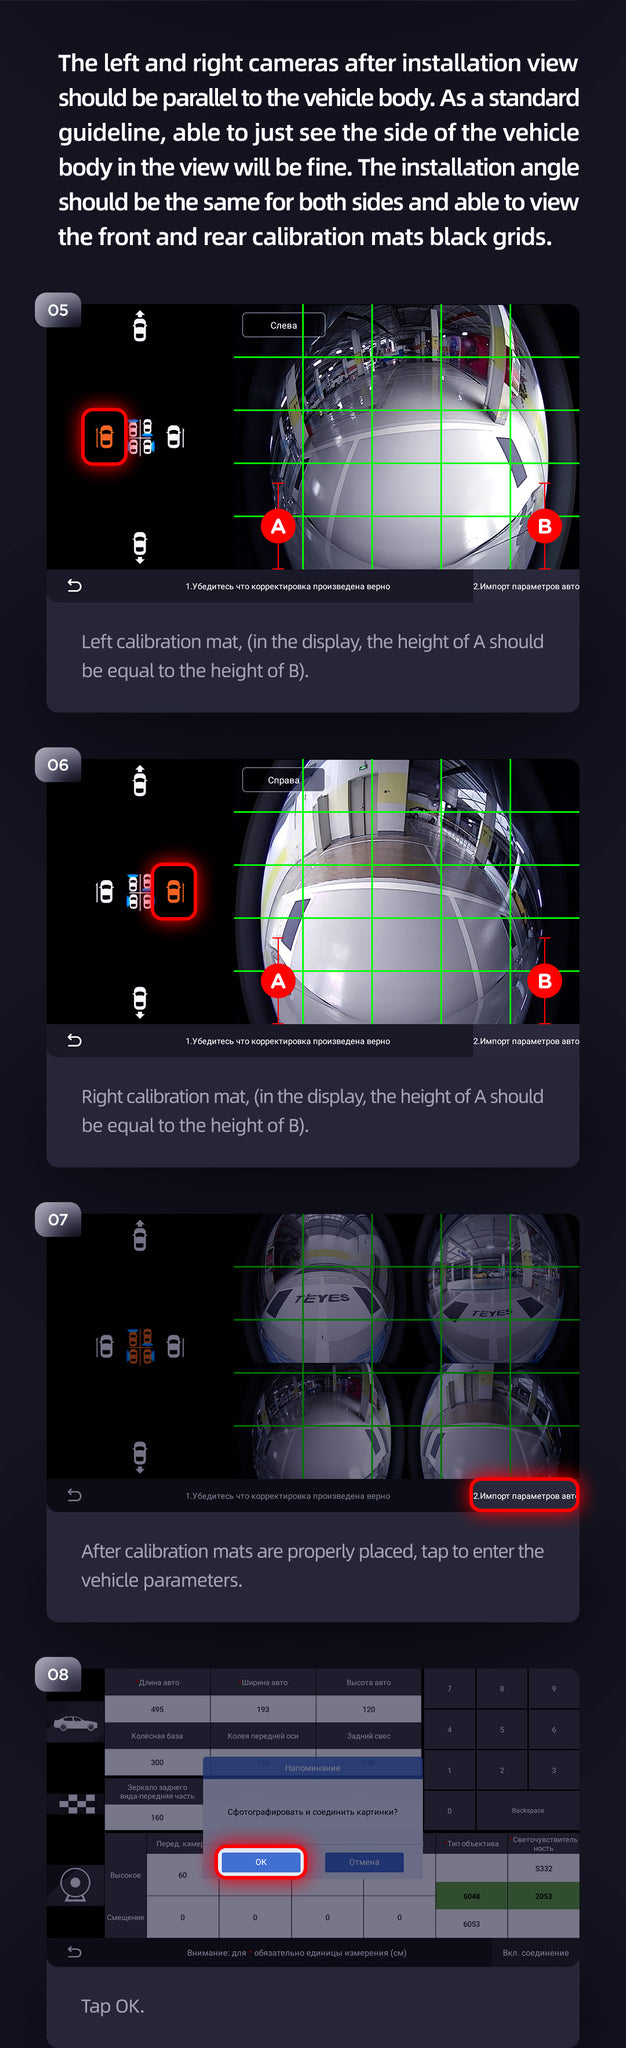
- Open the left camera view. If your preview shows reference lines, check that the front and rear target marks align at the same height.
- Repeat the alignment check in the right camera view. The side cameras should show comparable angles and a narrow strip of vehicle body.
- Return to the combined preview and open the vehicle measurement screen once the mats and camera views are aligned.
- Acknowledge the confirmation prompt if it appears, then continue to the measurement fields.
Step 3 – Enter measurement distances

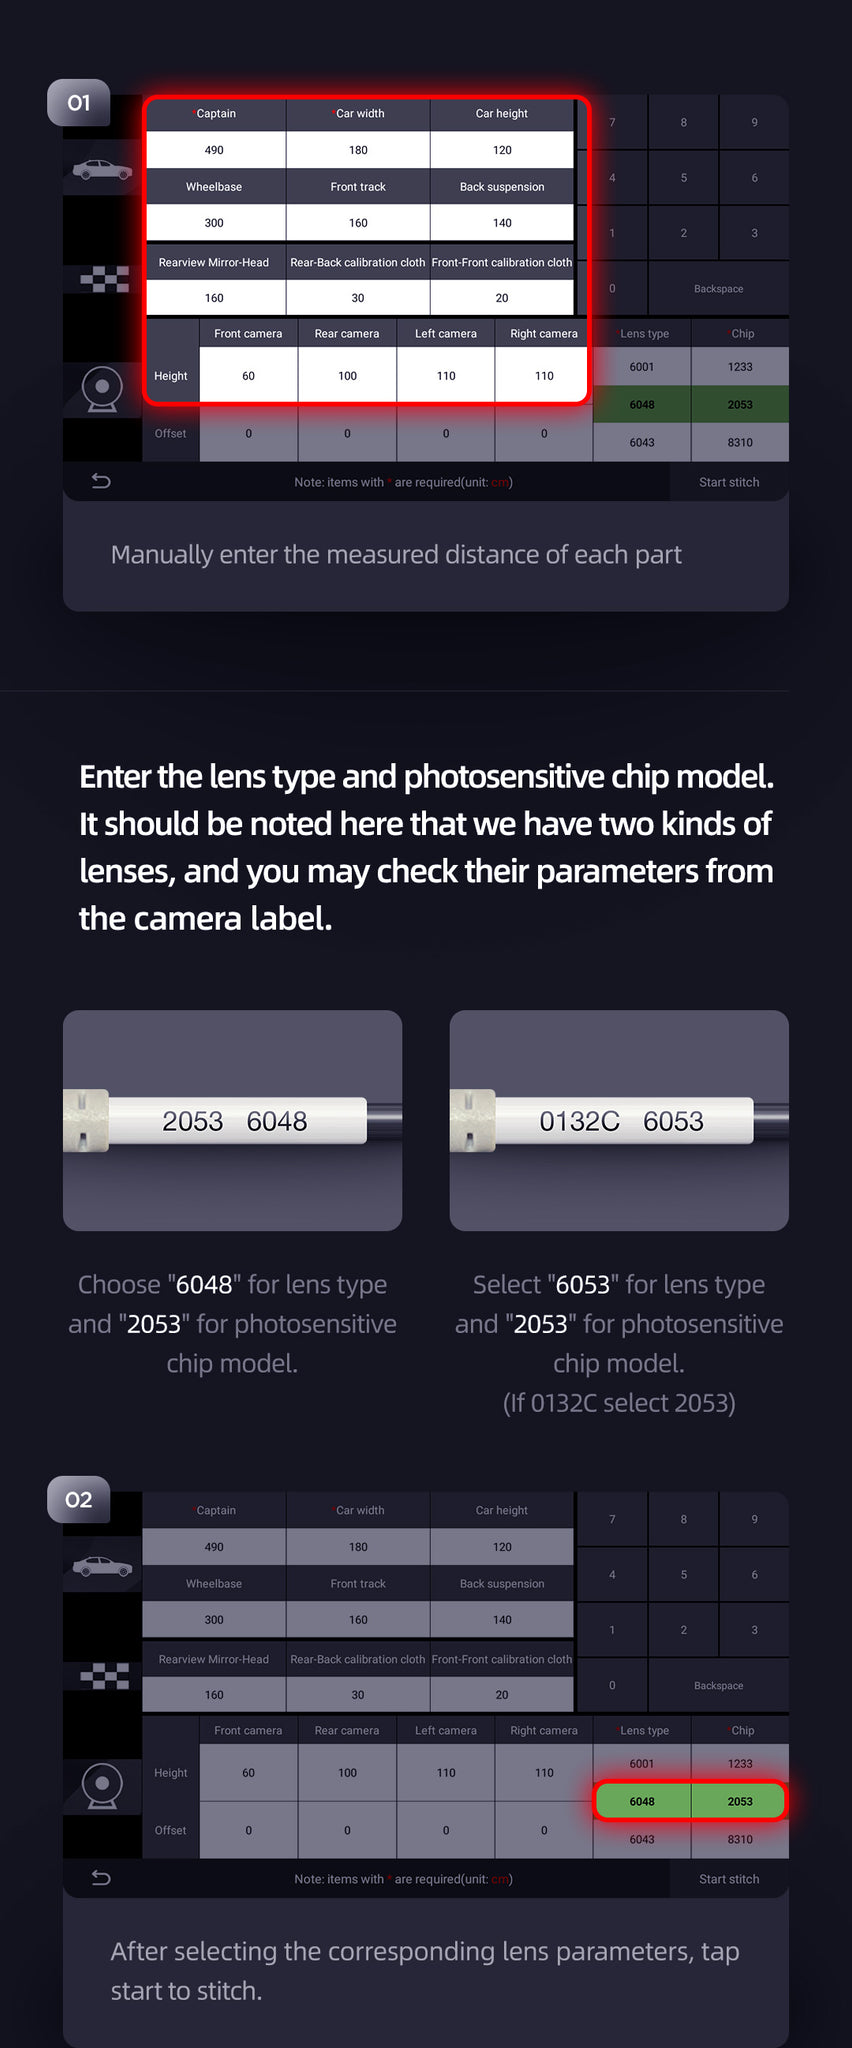
- Enter the dimensions requested on screen. Depending on the kit, this can include vehicle width and height, wheelbase, front track, rear overhang, the distance from the mirrors to the front of the vehicle, front and rear mat gaps, and the individual camera heights. Follow the diagram for the exact endpoints and use the units shown.
- If the app requests lens and image-sensor settings, identify the cameras from their labels and use the profile specified for your kit. Start stitching once the values and profile are confirmed.
Step 4 – Basic fine tuning
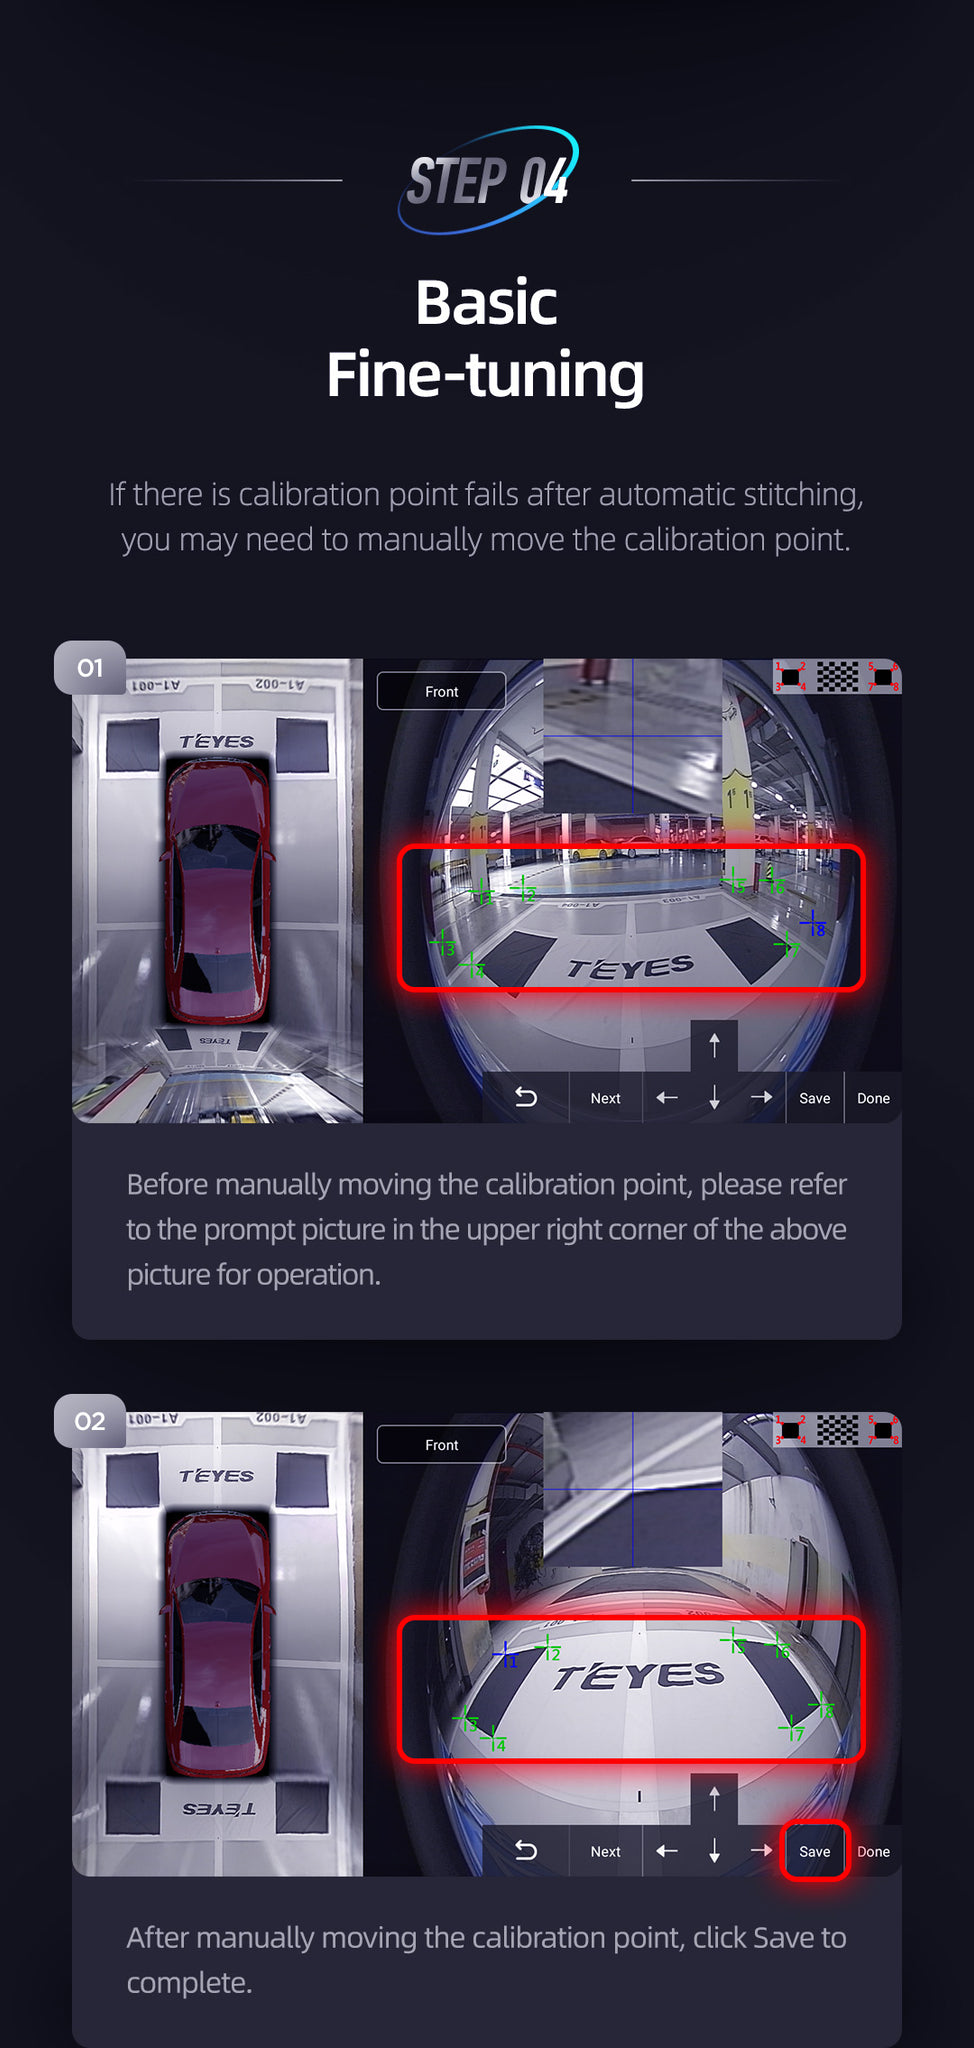
- If a point was missed or detected in the wrong spot, select the affected camera and use the on-screen diagram to identify the correct target corner.
- Move the point onto that corner using the manual adjustment controls, then save. Review the overhead view and check the adjacent joins.
Step 5 – Advanced fine tuning
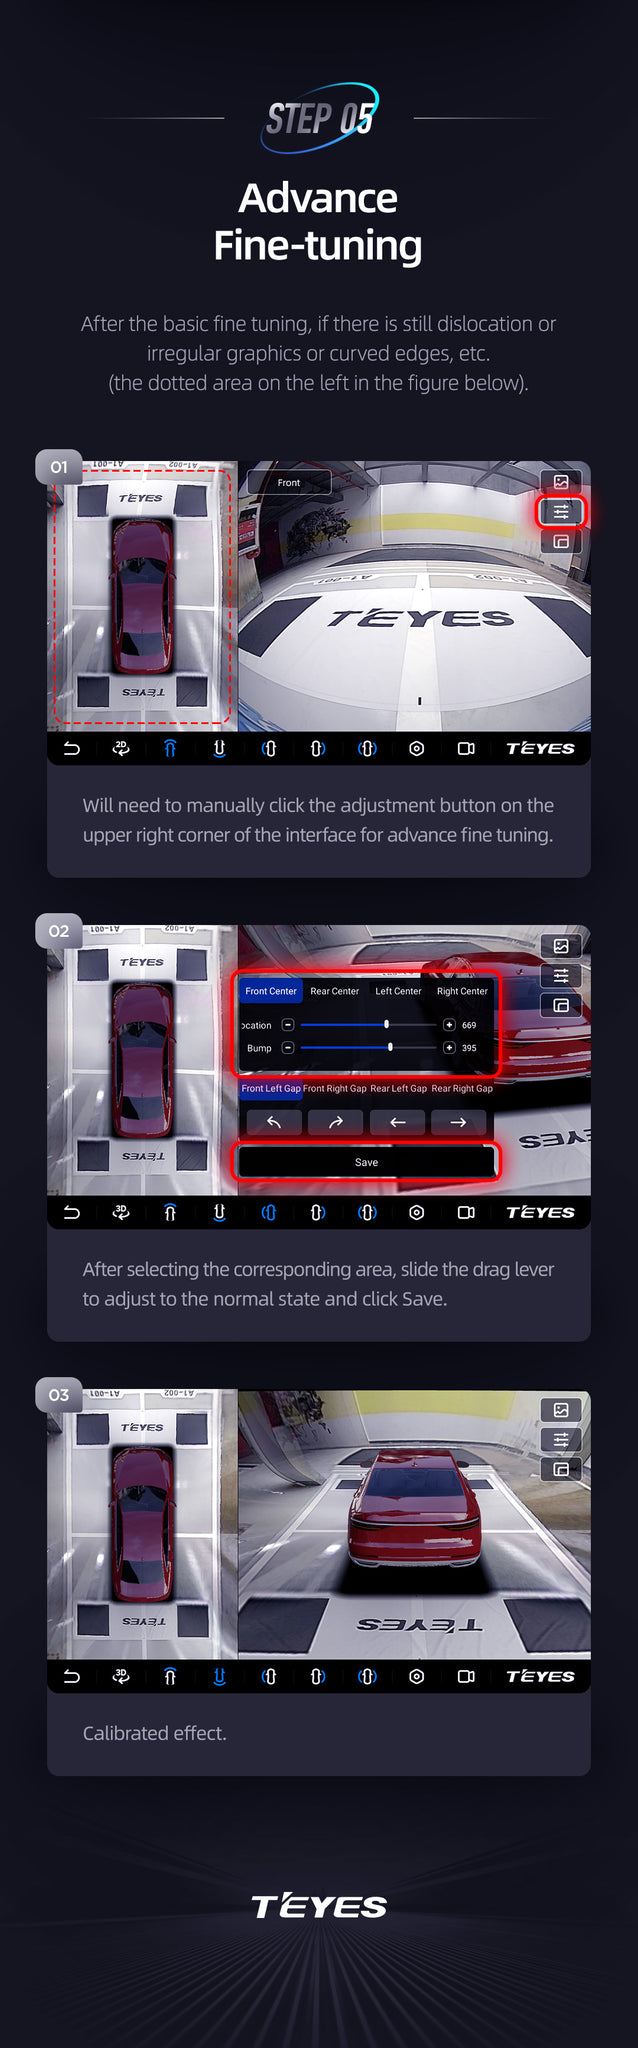
- If an edge still bends or jumps after basic tuning, open the advanced adjustments if your app provides them and select the affected view or seam.
- Adjust one area at a time in small increments while watching a straight reference line. Save once the line joins cleanly. If several seams are still distorted, recheck mat placement, measurements and camera mounting.
- Check the saved overhead and individual views with the vehicle stationary. Look for discontinuities and duplicated lines around all four corners. Check against what you can see directly before using the view while manoeuvring.
Open the CC4 Pro activation instructions · Compare camera packages · Find a TEYES installer